※ Updated 2021.02.14
It turns out the method I wrote about for installing Java 8 on Debian 10 stopped working because the package server shut down.
So I’m back with a new way to do it.
Click here to jump straight down to the new instructions.
When I wrote my post last year about hosting Minecraft on Google Cloud, I was using Debian 9. When I checked again this year, I saw that Debian 10 was out.
Because of an issue with Oracle, if you follow the instructions in https://harineubo.tistory.com/7 on Debian 10, Java installs, but you can’t start the server. Debian 10 can’t download Java 8 on its own, so it downloads and installs Java 11. If you then run the java -Xms ... command, you get this error: Current Java version (11.0.7) is not supported, please replace to Java8
It looks like quite a few of you have been having trouble with this, so I wanted to show you how to fix it. The easiest thing would probably be to just use Debian 9, the previous version, and follow the steps I gave there.
Now let me show you how to install Java on Debian 10.
1. Add a package download server

If you install Java the way we did on Debian 9, you’ll see the message above when you start Bukkit. So we need to switch to Java 8, but Debian 10 doesn’t support installing Java 8 by default.....
So if you try running sudo apt install openjdk-8-jdk -y to install it,
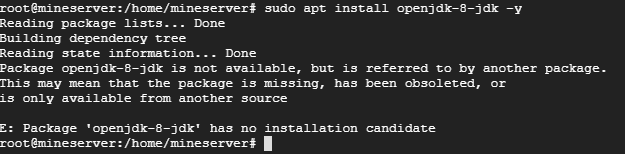
you’ll see a message like this: E: Package 'openjdk-8-jdk' has no installation candidate
So is there really no way to install it on Debian 10...? Well, there is.
Debian doesn’t support downloading Java 8 by default, but you can still download it if you change a few settings yourself.
On Linux, you install packages with the apt-get command. The installation files aren’t always on your system, so apt-get downloads them from another site and installs them. The file /etc/apt/sources.list lists the servers it uses.
deb http://ftp.us.debian.org/debian sid main is the line to add to that file.

The command I used opens vim, a Linux text editor. Think of it as something like Notepad on Windows. When you enter the command shown here,
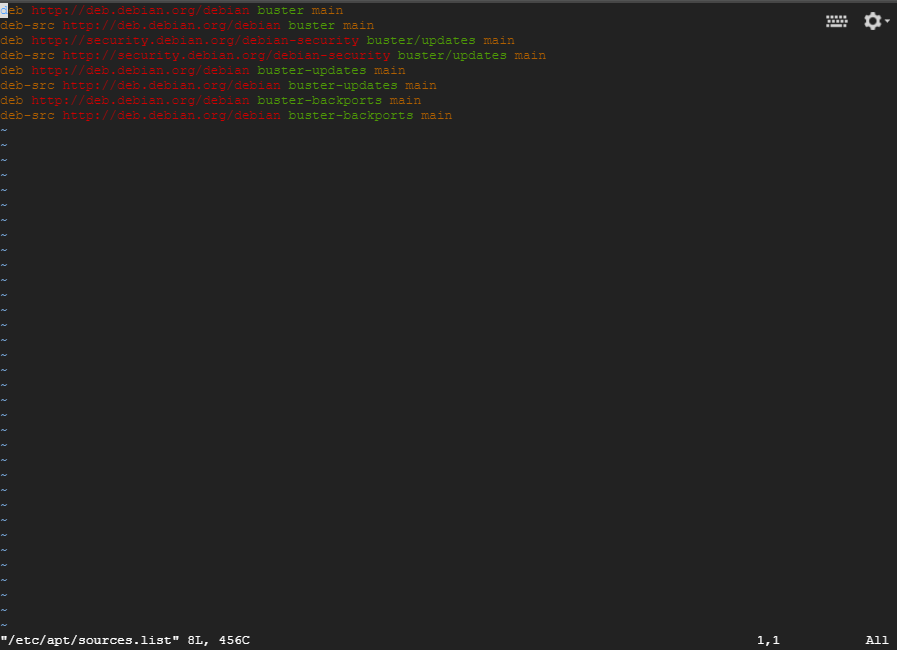
this odd-looking window opens. It shows the contents of sources.list.
Add the line from earlier, deb http://ftp.us.debian.org/debian sid main at the very bottom of the file.
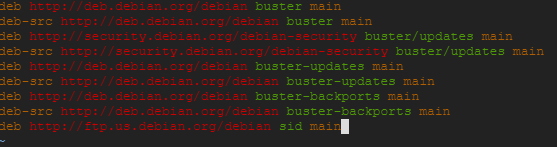
See the extra line at the end? That’s all there is to it. Oh, before we move on, here’s a quick tip on using vim. When you want to type in it like you would in a document, press i. Down at the bottom

you’ll see INSERT, just like this. That means you can start editing. When you’re done, press esc and type :wq to save and exit. If you just type :q there, you quit without saving, though on Linux :q won’t let you quit if you’ve changed the document. In that case you can type :q! to force it to quit without saving.
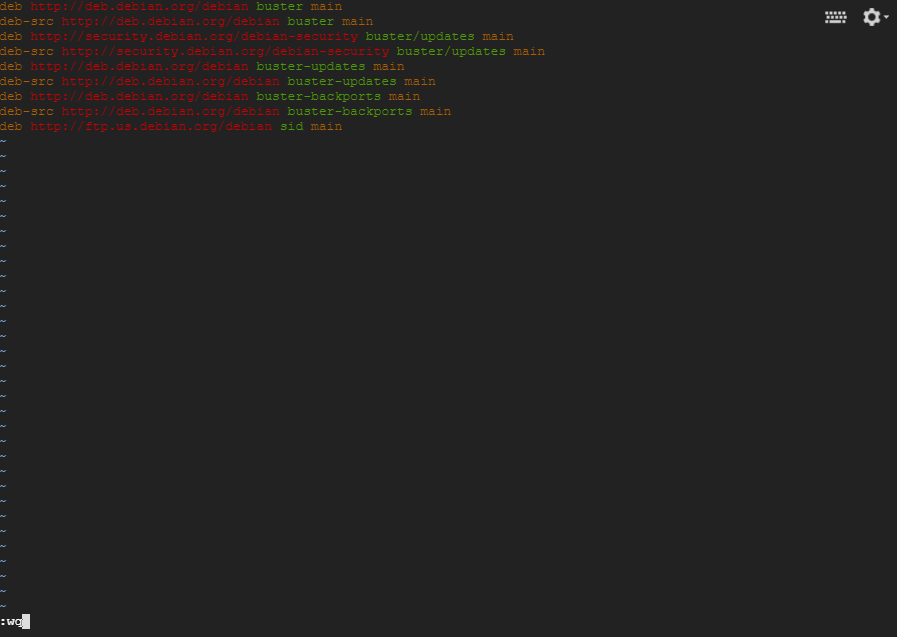
That got a bit long, but anyway, once you’ve made the edit, press esc as shown, type :wq and press Enter. That saves the change and takes you out of the editor.

Next, type sudo apt-get update as shown.
2. Install Java 8
Once the update finishes, type sudo apt-get install openjdk-8-jdk.
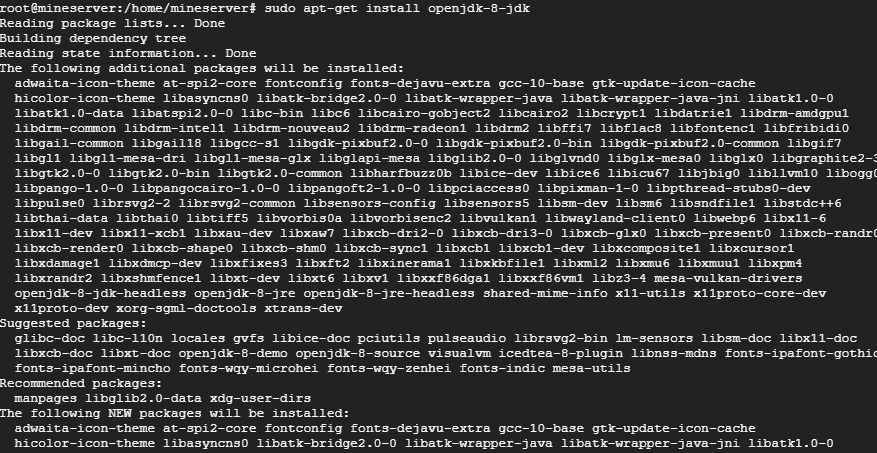
Type that and press Enter to start the installation. Then type y to let it finish installing. It takes a little longer than you might expect, so let’s be patient and give it a bit.
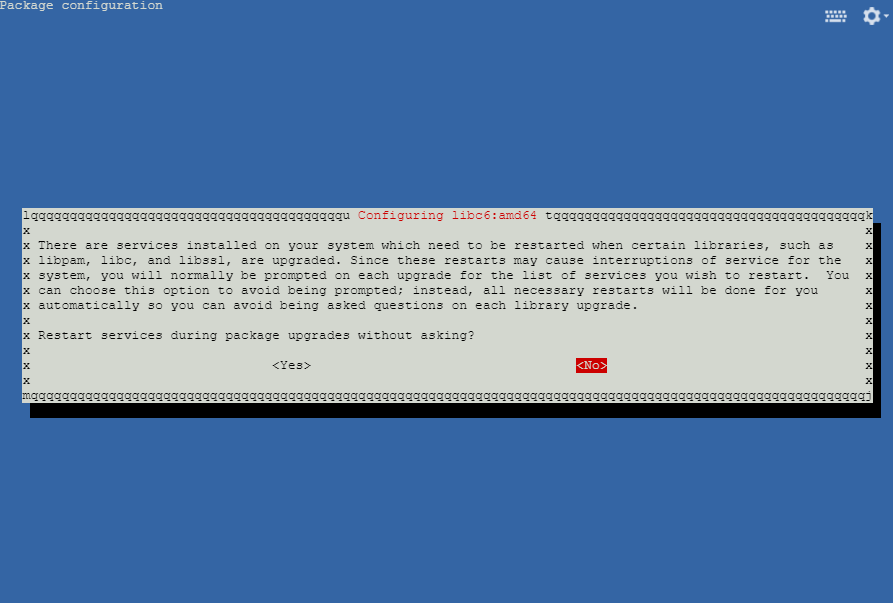
Partway through the installation, a window like this will appear briefly. Don’t worry. Use the arrow keys to select Yes, then wait for the installation to finish. That’s it!!
3. Switch Java versions
Now for the last step, type sudo update-alternatives --config java. When you do,
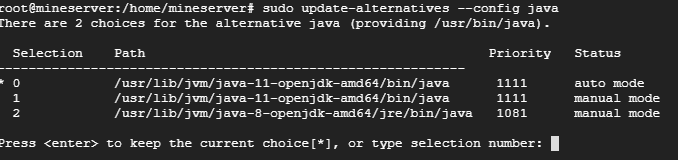
you’ll see something like this. Since Java 8 is the version we want to install, type 2 and press Enter.
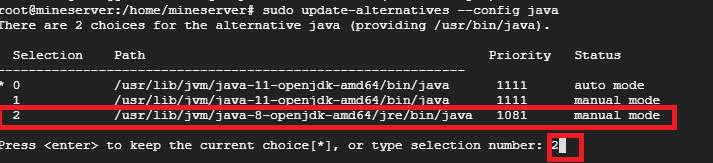
Now when you start Bukkit,

you can see it running without any errors and downloading the files.
These server files can take longer to download than you might think, so give it some time and before you know it they’ll all be there.
Mine looks like this because I’m using CatServer. If you’re using something else, yours might look different, so don’t be surprised if it does. Just keep going.
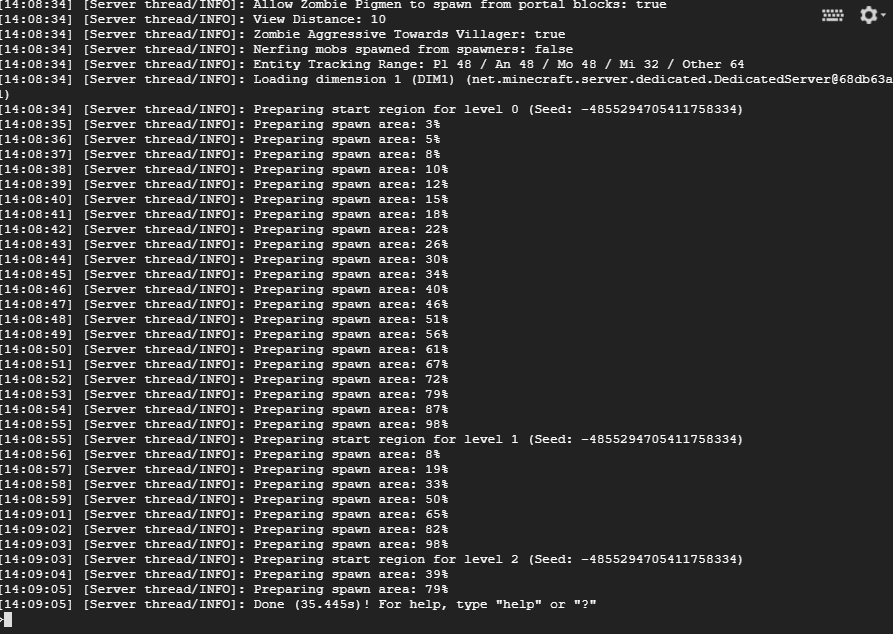
I was able to get my CatServer Bukkit server up and running reliably on Debian 10 this way.
There was surprisingly little out there about this method, so I imagine some of you had a hard time finding it. I hope this post helped you get it working!!
I’ll wrap things up here.
※ The new way to install Java 8
The commands are pretty long this time, so watch out for typos as you follow along.
First up:
sudo apt update
Enter that command.

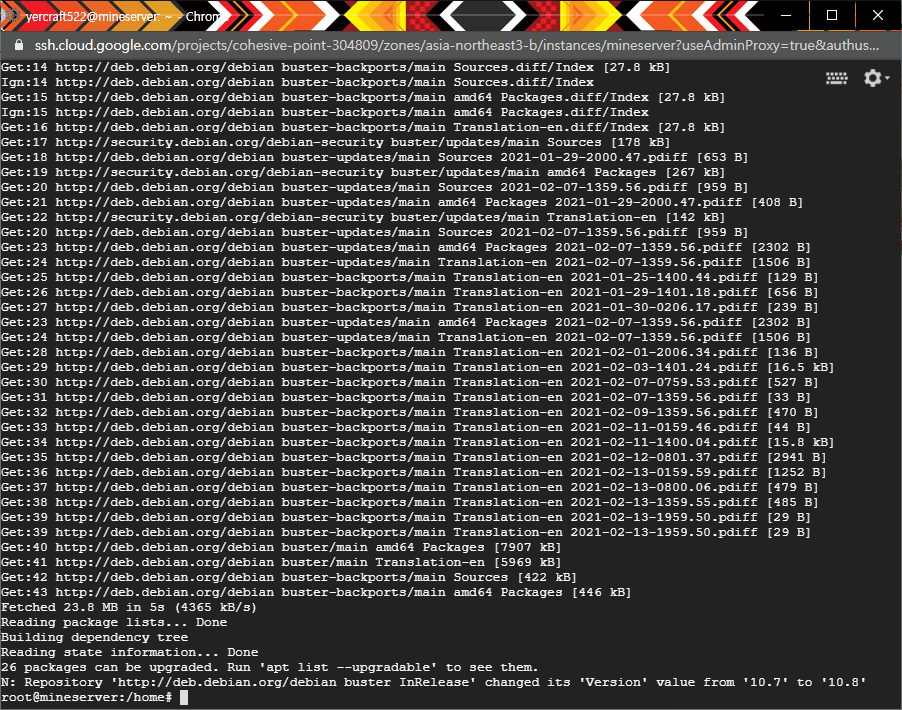
Once you enter it, you’ll see a whole lot of stuff scroll by like this.
Next up:
sudo apt install apt-transport-https ca-certificates wget dirmngr gnupg software-properties-common
Type in the command above.
Then:
wget -qO - https://adoptopenjdk.jfrog.io/adoptopenjdk/api/gpg/key/public | sudo apt-key add -
Enter this command.
After that:
sudo add-apt-repository --yes https://adoptopenjdk.jfrog.io/adoptopenjdk/deb/
Type that command in.

This one won’t take long once you enter it. It finishes right away.
Now we can finally get to the installation itself.
First, type sudo apt update.
Next:
sudo apt install adoptopenjdk-8-hotspot
Enter the command above.
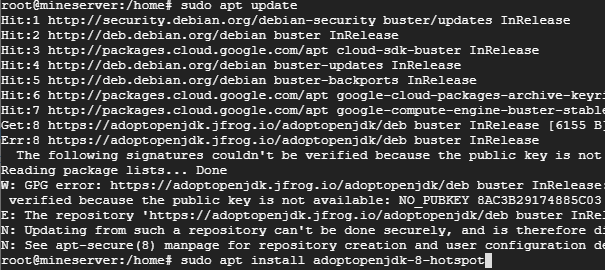
As shown here, enter sudo apt update and sudo apt install adoptopenjdk-8-hotspot
one at a time, pressing Enter after each command.
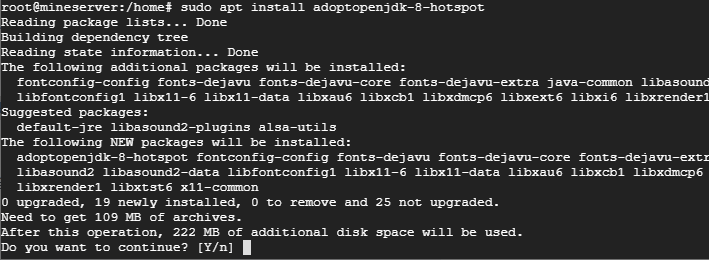
After you enter the command, you’ll see another prompt like this. Type y here.
That finishes the installation.
Now let’s check that Java installed properly, shall we?
Type java -version.

If you see 1.8.0 like in the screenshot, it worked.
This method is pretty simple, so you should be able to follow along easily.
Thanks for reading such a long post!