Last year I showed you how to use Google Cloud to keep a Minecraft server running around the clock for a whole year for free.
When I checked recently, though, I found that Google Cloud Platform (GCP) had changed its policy. The free trial is now three months.
Instead, Google has introduced Always Free products that you can keep using indefinitely as long as you stay within the free usage limits.
The specs are pretty limited, though, so I’d treat this as a reference only.
If you’re only planning to run something small, I think you’ll be fine using it.
I’ll assume most of you got here after reading my earlier posts.
If any of this is unfamiliar, please have a look at my earlier post first.
Google Cloud (GCP) Always Free requirements
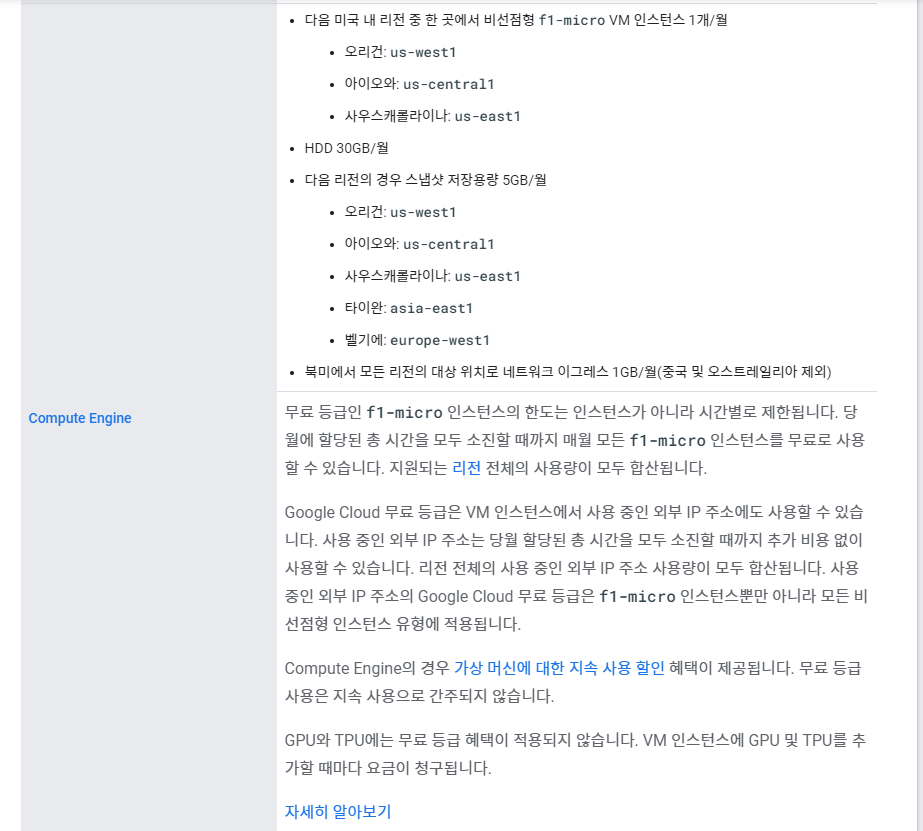
The requirements say you need to use f1-micro and choose a US region such as Oregon, Iowa, or South Carolina. It also says you can use up to 30 GB of HDD storage per month.
Creating an instance
I covered account setup in my earlier post, so I’ll just go over the steps briefly here.
1. Create a Google account
2. Register a billing account with GCP
3. Create a project
4. In GCP, go to Compute Engine, then VM instances, and create an instance
I imagine you all have a Google account already, so head over to Google Cloud Platform
and get started with your account. Then register your billing account.
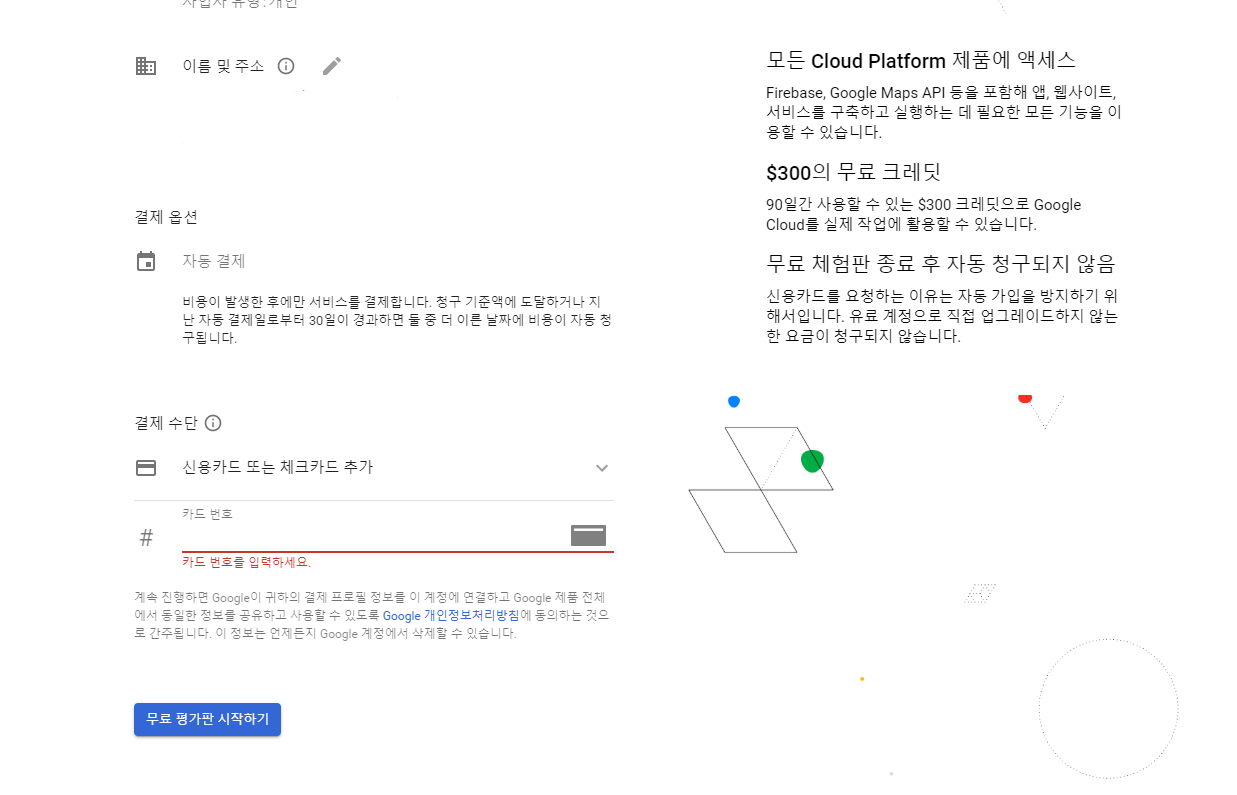
Next you’ll need to create an instance, so go to VM instances under Compute Engine.
Click Create instance at the top.
That should bring up the window for creating an instance. Before we create it, let’s take another look at what’s included for free:
- One non-preemptible f1-micro VM instance per month in one of the following US regions:
- Oregon: us-west1
- Iowa: us-central1
- South Carolina: us-east1
- 30 GB of HDD storage per month
- 5 GB of snapshot storage per month in the following regions:
- Oregon: us-west1
- Iowa: us-central1
- South Carolina: us-east1
- Taiwan: asia-east1
- Belgium: europe-west1
- 1 GB of network egress per month from North America to destinations in all regions except China and Australia
So that’s what’s included.
Give the instance whatever name you like. I’ll set the region to Oregon.

Next up is the machine configuration. Remember how the requirements said to use f1-micro?
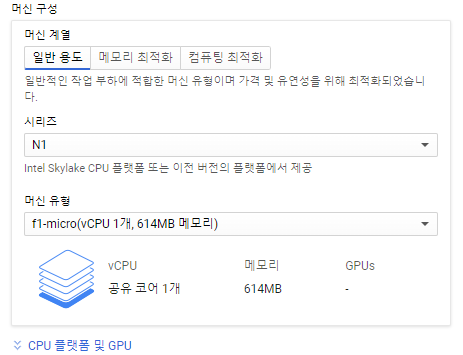
As in the picture, choose N1 under Series and f1-micro under Machine type.
All the other machine types cost money, so make sure you select f1-micro.
In my experience, though, if you’re going to run a game server for a long time,
I think it’s worth paying for the peace of mind.
Anyway, now that you’ve got this far, it’s time to set up the boot disk, right?
Most Linux distributions are free, though some companies charge for theirs.
So this time I’m going with Ubuntu.
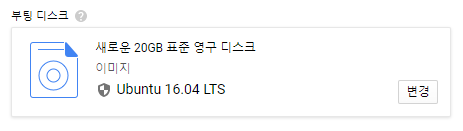
I set mine to Ubuntu 16.04 LTS.
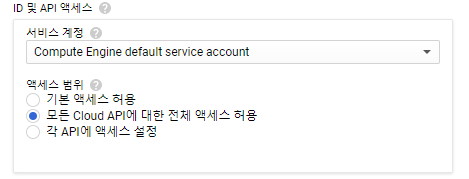
Under Identity and API access, select Allow full access to all Cloud APIs.
Once you’ve done that, look for Management, security, disks, networking, sole tenancy under Firewall.
Click it and you should see a screen like the one in the picture below.
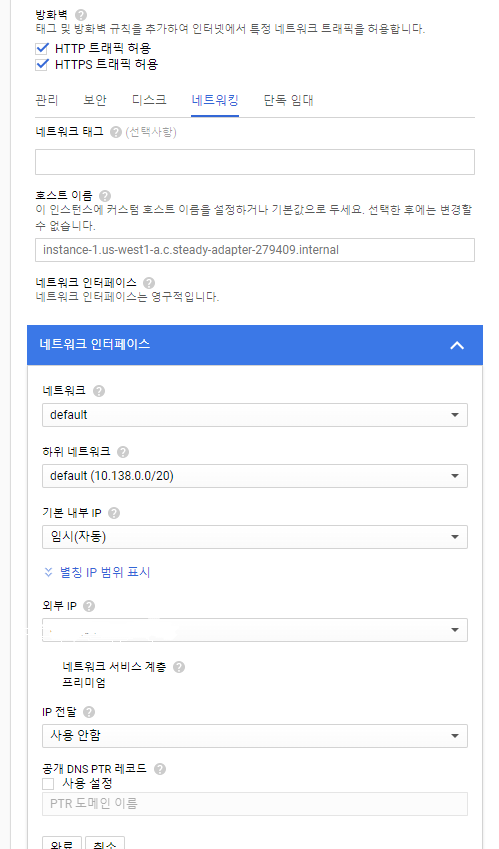
First, under Firewall, check both Allow HTTP traffic and Allow HTTPS traffic.
I chose a static IP under External IP, but I’m still not sure
how that will affect my use of the free tier. I’ll check again later and let you know.
Once you’ve got this far, click Create at the bottom.

You’ll have a new instance, just like this.
So that’s how I created an instance with Google’s new Always Free offering.
Honestly, I think it’ll be tough to run a server with these specs, but I’ll test it
and let you know whether it runs poorly or works just fine.
Thank you for taking the time to read this post despite its shortcomings.