Hi everyone!
This time I’d like to show you how to use ASUSTOR Live on an ASUSTOR NAS.
You can think of ASUSTOR Live as a hub that gives you a range of features for live streaming.
So why use it?
Streaming software tends to eat up quite a few system resources,
so a lot of people stream with a two-PC setup.
But sometimes, for one reason or another, a two-PC setup just isn’t an option.
That’s where ASUSTOR Live comes in. If you send your stream from XSplit or OBS to your NAS,
the NAS can stream to Twitch, YouTube, Facebook and so on all at once, so you can make better use of your computer’s resources.
It also automatically records your video while you’re live and saves it to your NAS,
which makes editing videos for YouTube really convenient.
Anyway, I’ve gone on long enough. Let’s get to it.
1. Installing ASUSTOR Live
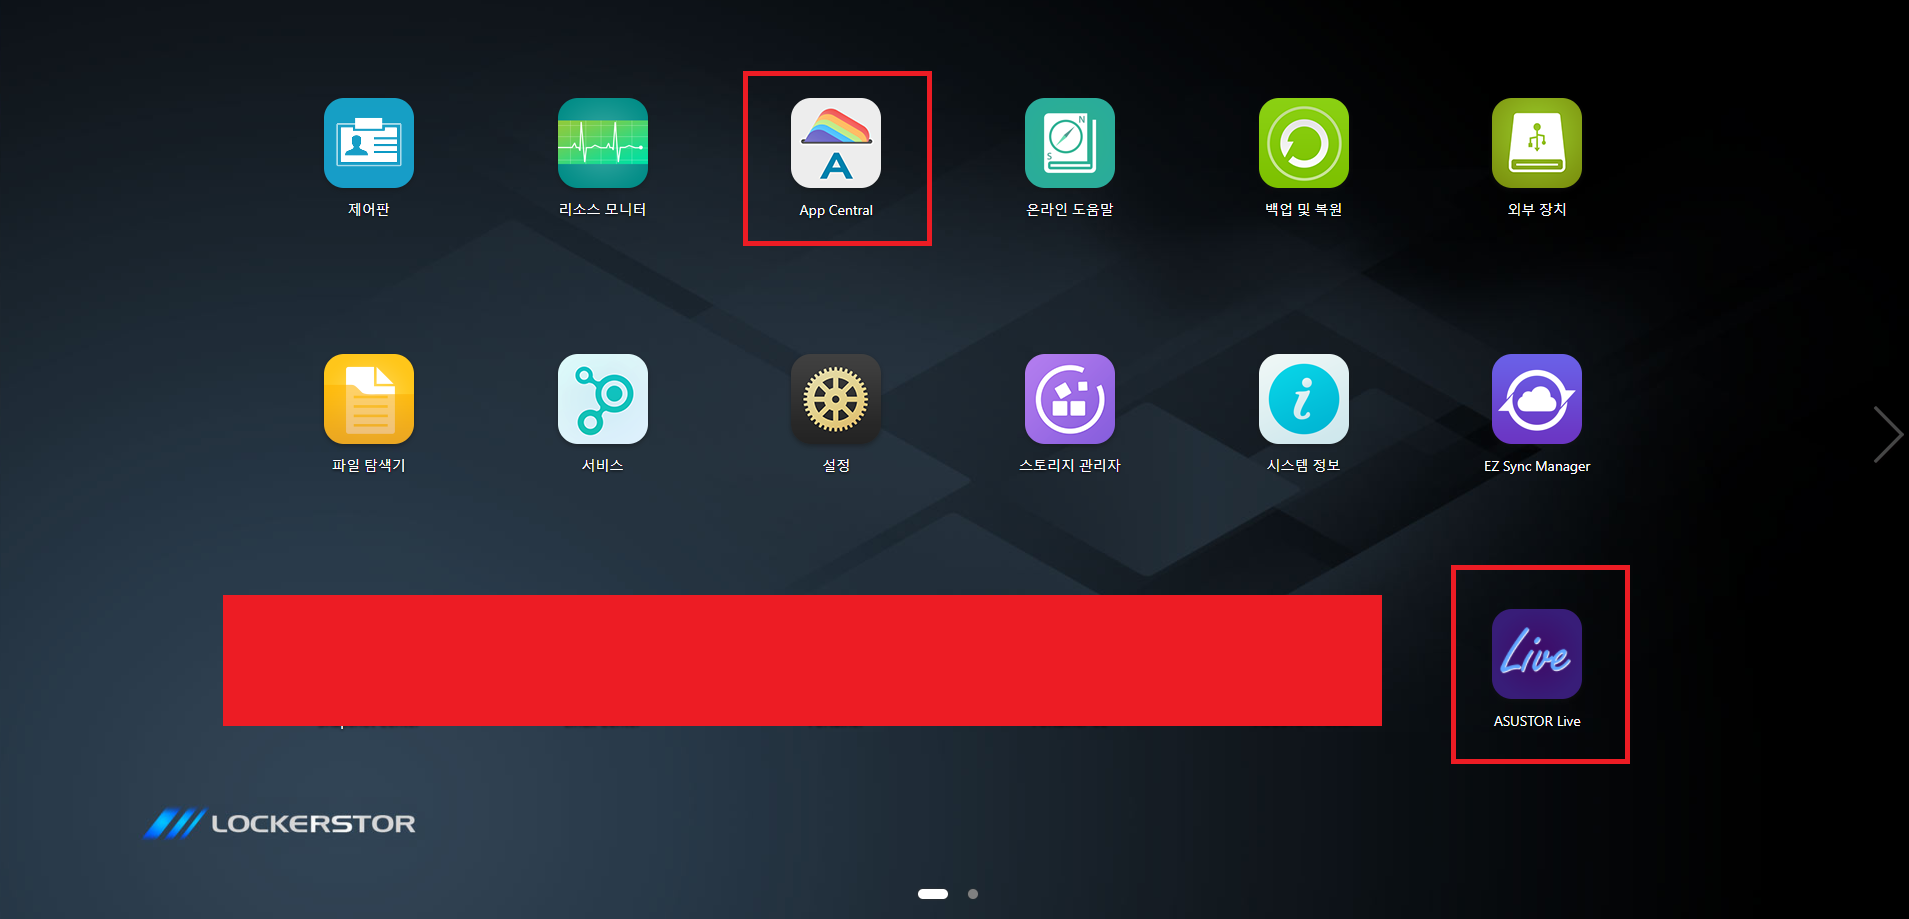
Connect to your NAS and log in. You should see a screen like this.
From here, open App Central.
Then search for ASUSTOR Live and install it as shown in the screenshot below.
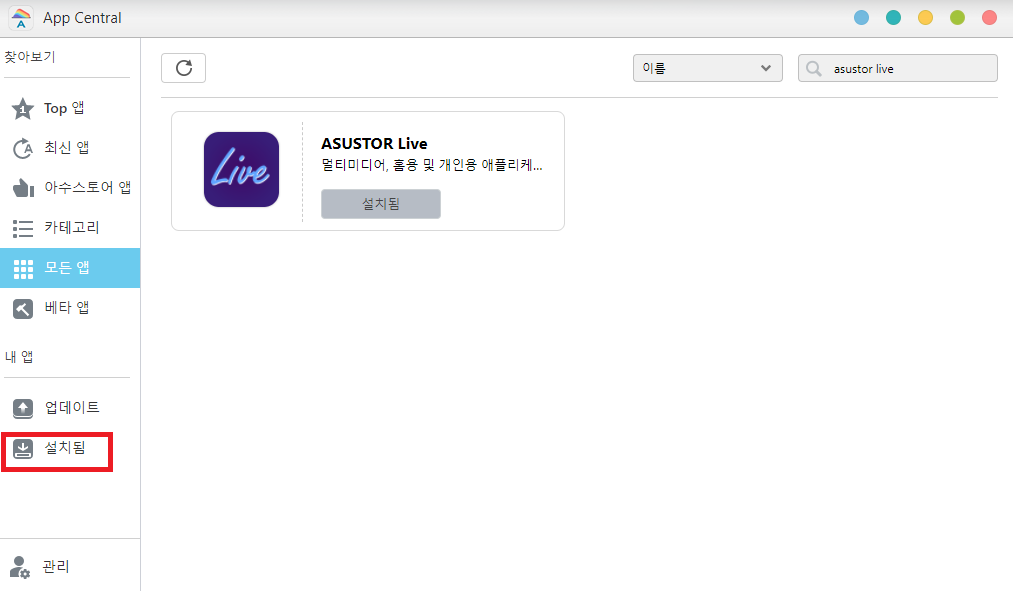
Click Installed on the left to see how the installation is coming along.
Once it’s installed, you’ll see it on your NAS home screen.
Click it to open it.
2. Setting up ASUSTOR Live
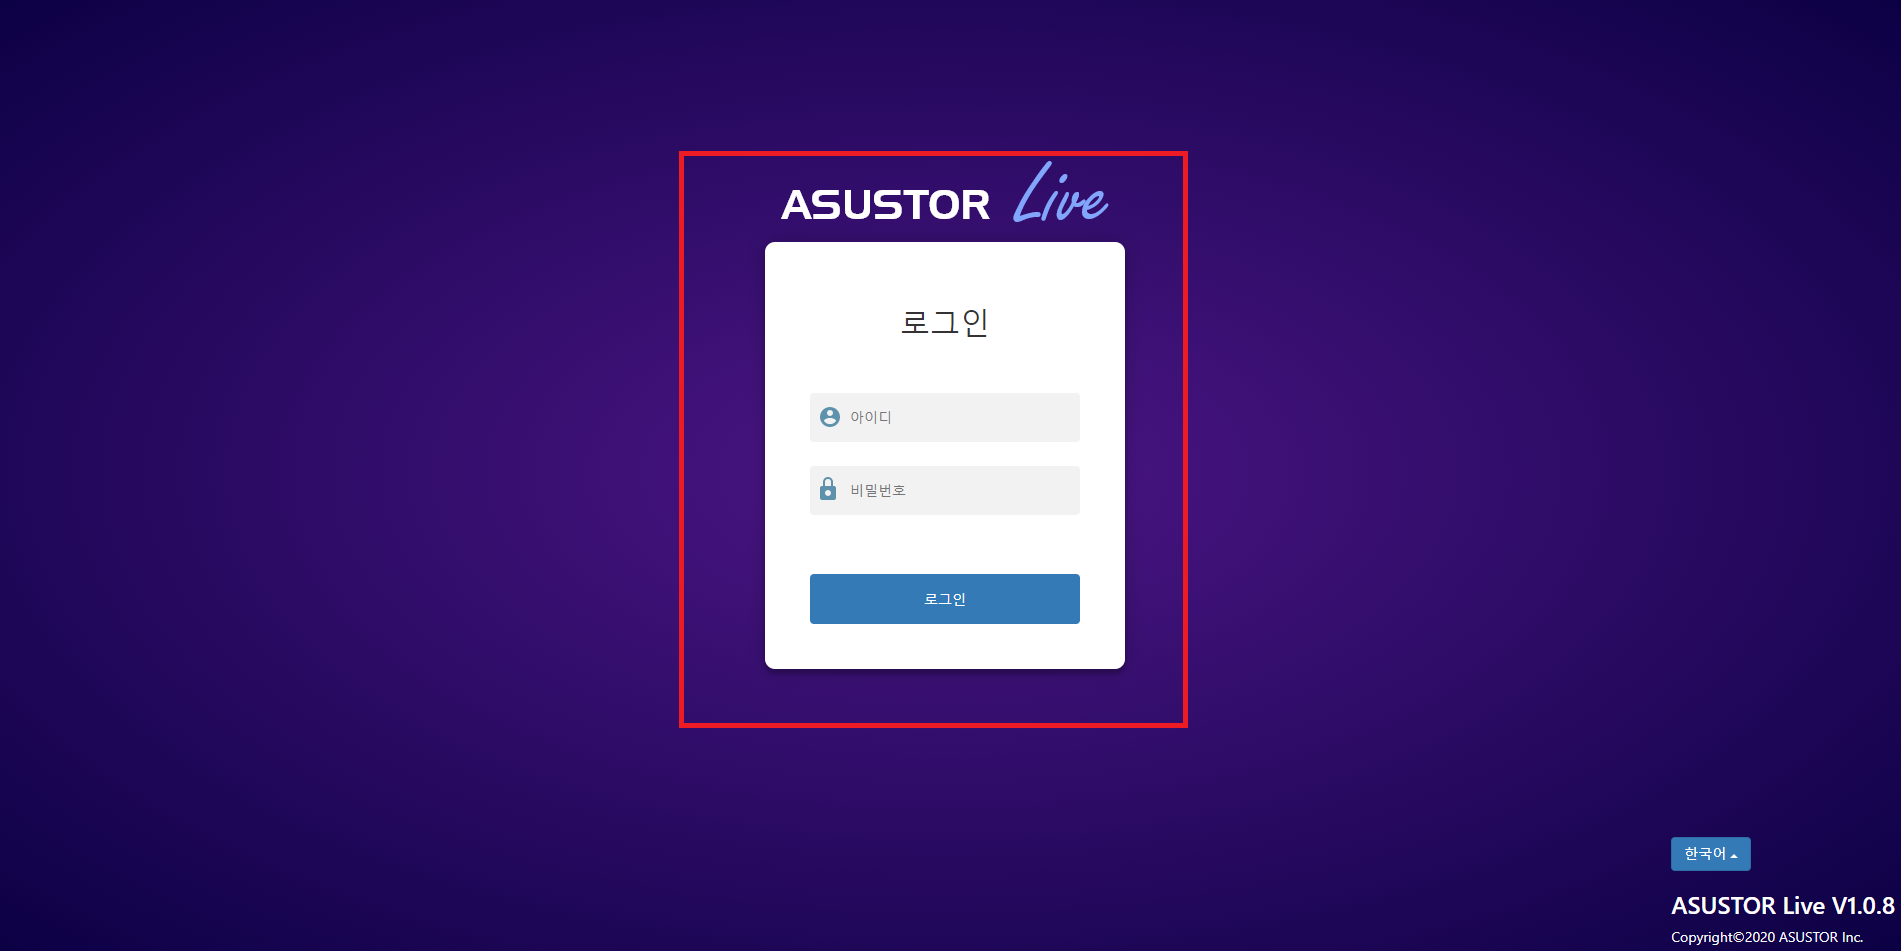
The first time you open it, you’ll see a sign-up window.
I forgot to get a screenshot of the sign-up window, but it’s pretty straightforward. Go ahead and sign up,
then log in here.
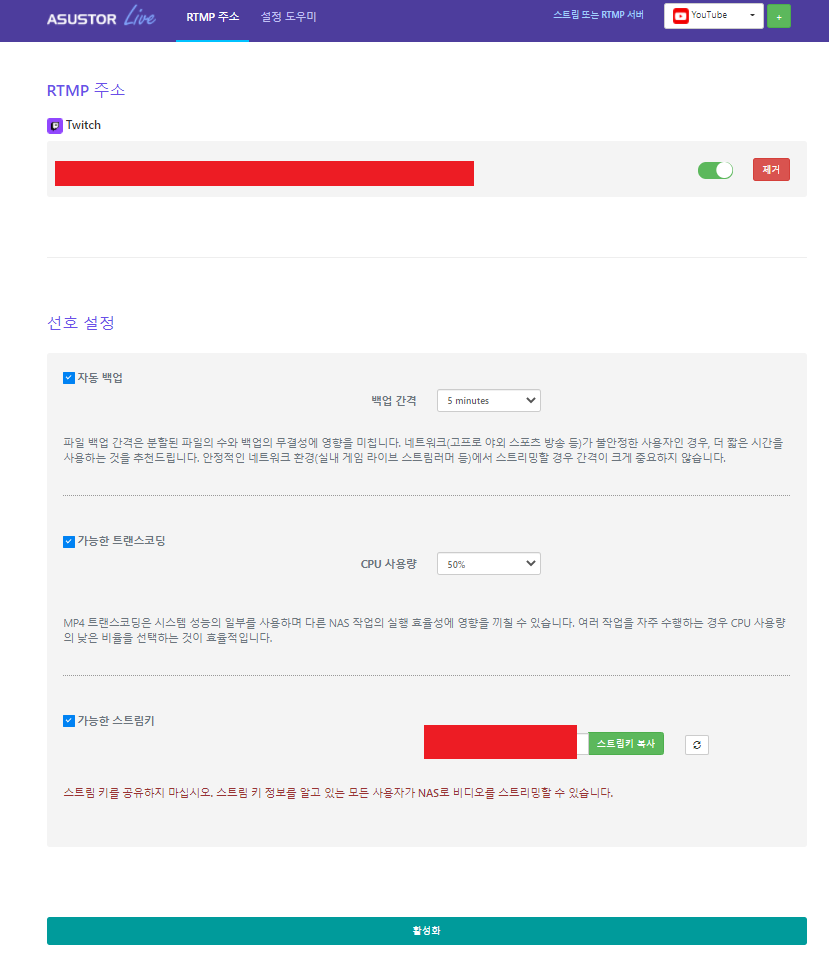
Once you’re logged in, you’ll see a window like this.
First, the stream key option at the very bottom will probably be off, so turn it on.
Next, open whichever streaming software you use.
I use XSplit, so that’s what I’ll use to show you.
The setup is much the same in OBS. You’ll find instructions for OBS in the setup wizard,
so take a look there if you’re using OBS.
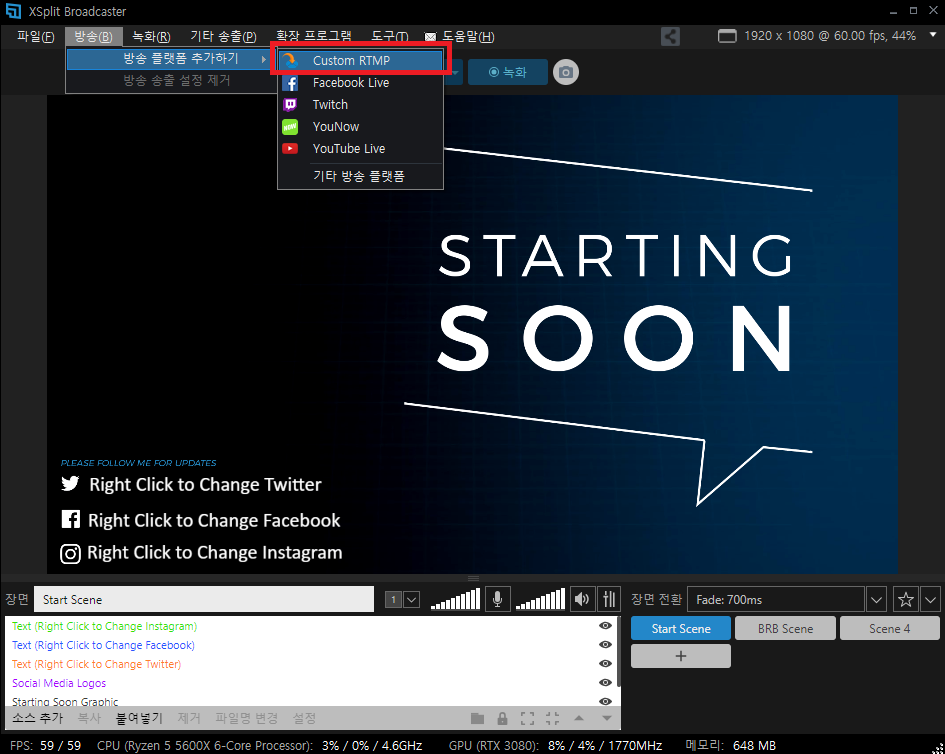
Once you’ve logged in to XSplit, open Broadcast, go to Add Platform and click Custom RTMP.
Next,
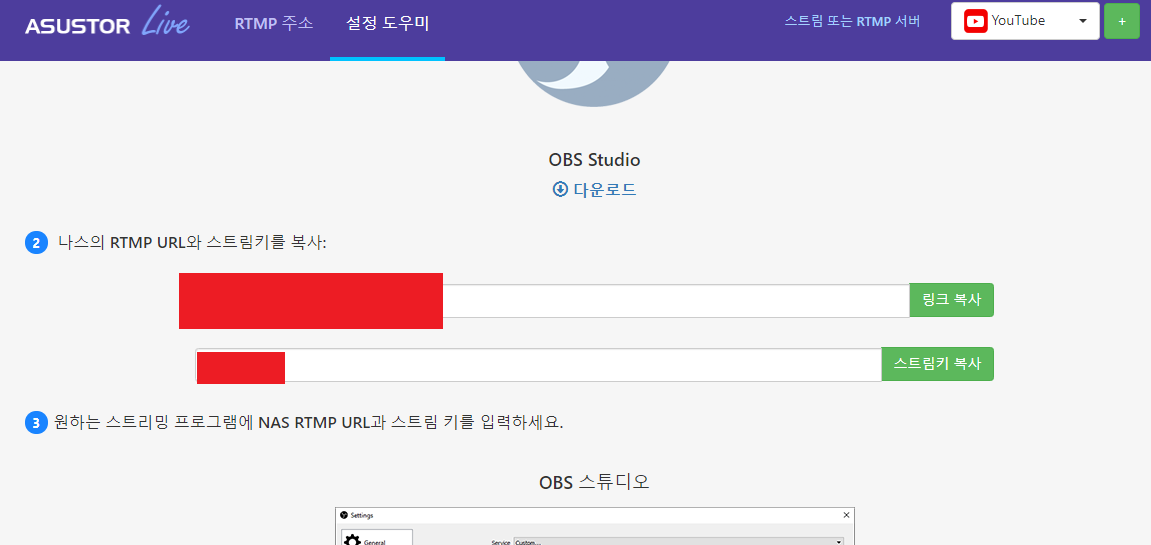
open the setup wizard in ASUSTOR Live and copy the RTMP URL and stream key for your NAS. You’ll need to paste them into XSplit.
When you switch back to XSplit,
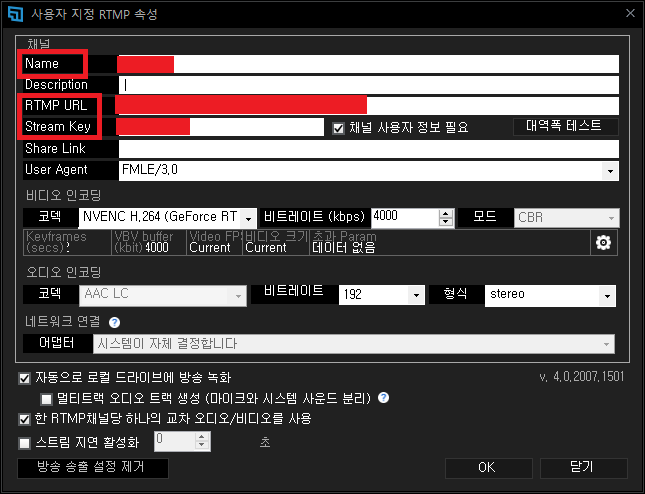
you should see a window like this. Enter whatever you like under Name,
paste the RTMP URL from your NAS into the RTMP URL field,
and enter the stream key in the field below it.
Adjust the other settings to suit you, then click OK.
Next, you’ll need to get the stream key from the platform you stream on.
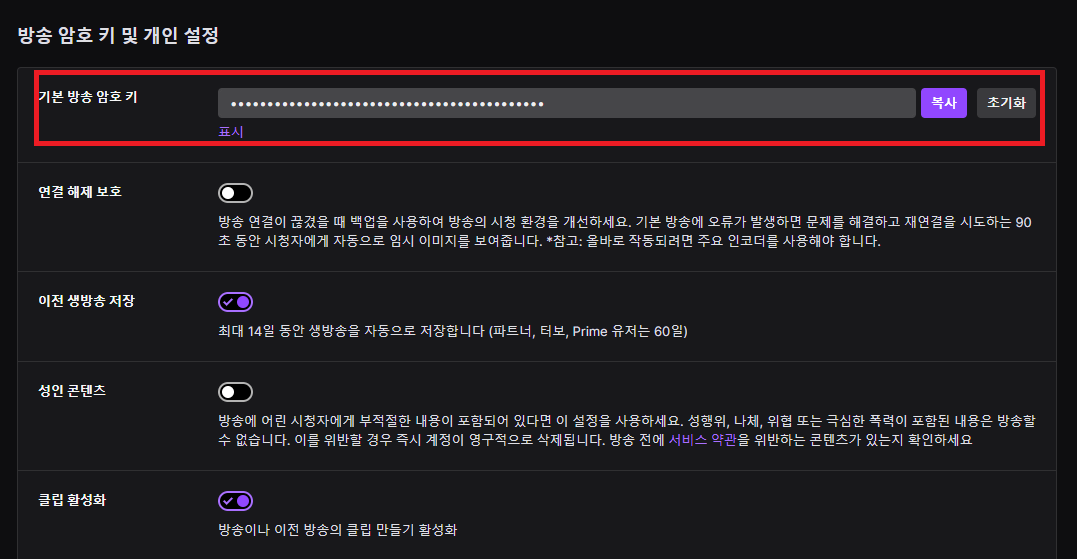
For Twitch, copy the stream key from your channel, then enter it in ASUSTOR Live.
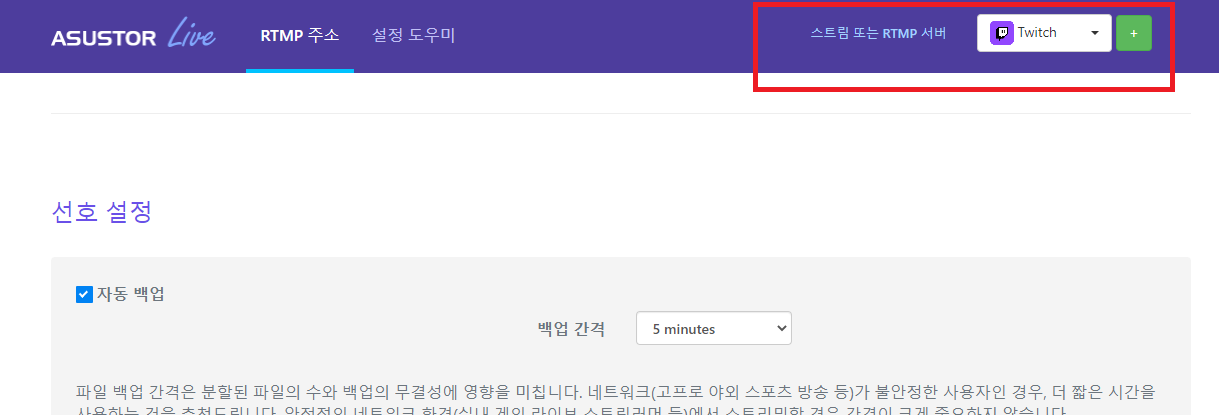
Go back to ASUSTOR Live, select Twitch and click '+'.
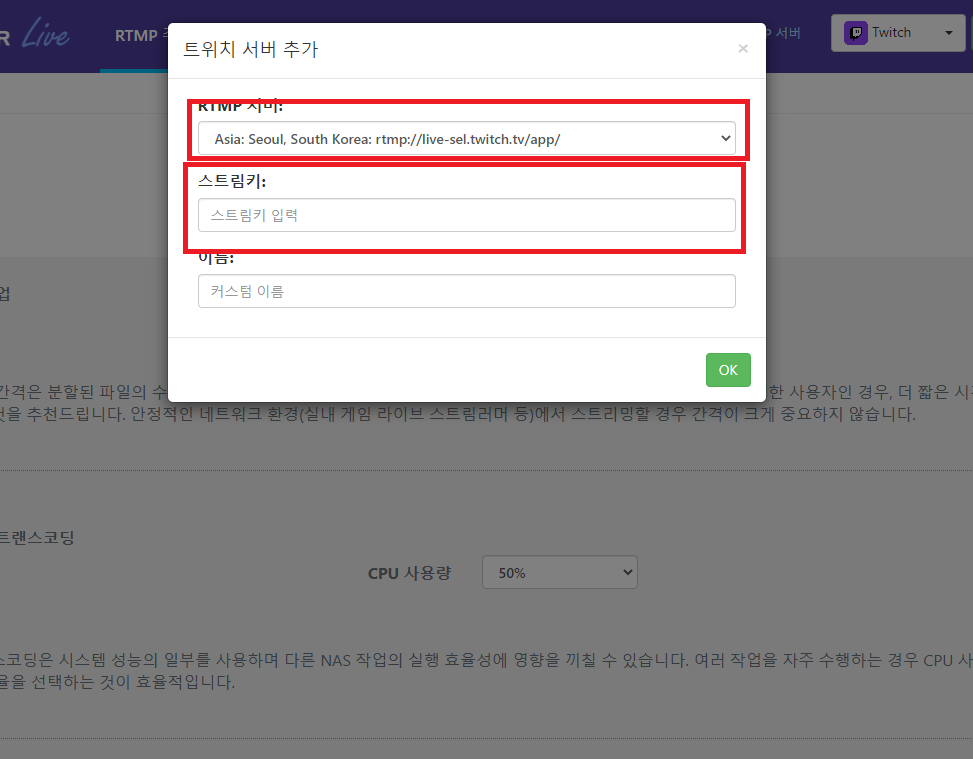
You’ll see a window like this.
For the RTMP server, choose the one that works best for where you live,
then enter the key you copied earlier in the stream key field and click OK.
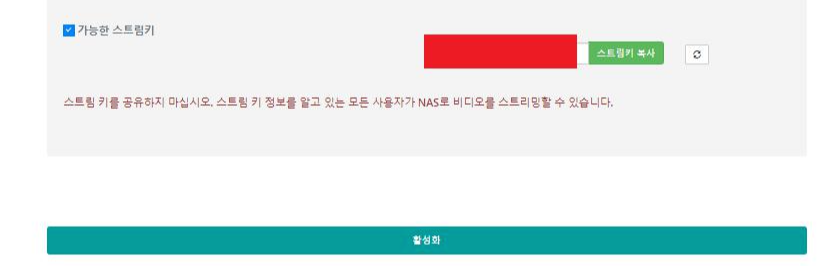
Click Enable at the very bottom, and that’s it for the ASUSTOR Live settings.
3. Restarting ASUSTOR Live
This is the last step.
Go back to App Central on your NAS, find ASUSTOR Live and open its details.
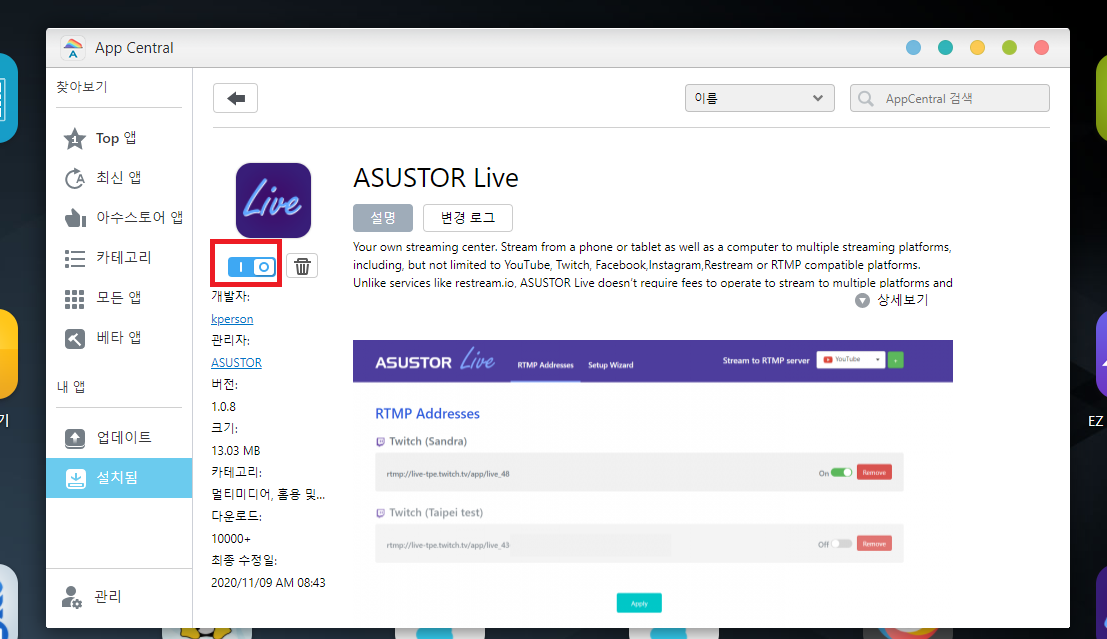
You should see something like this.
You’ll need to turn it off here and then turn it back on.
Click inside that red box to turn it off, then turn it back on and you’re all set.
Now all that’s left is to enjoy streaming!
ASUSTOR has a smaller user base than I expected,
so there aren’t that many people using this feature, but
if a two-PC setup is out of reach and you need a NAS,
I think this is a pretty good way to go.
I’ll leave it there for today.
Thanks for reading!